
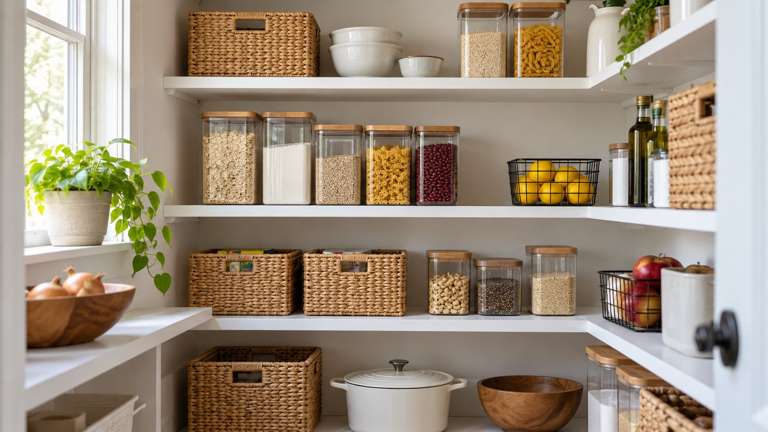
The best starting point for a shelving project is the collection of things the shelves need to hold. Before choosing a style, identify the items, the space available and the way you want to use the room. A shelf that looks good in a photograph still needs to fit your everyday routine.
This is a planning guide for a conversation about shelving and household storage. It does not specify anchors, load ratings or installation methods for your wall. Those decisions depend on the actual product, supporting surface and intended use.
Name the problem you want to solve
“More storage” can mean several different things. You may need a place for tall pantry containers, want laundry supplies easier to find, or hope to clear a work surface that has become a landing spot. Each problem suggests a different arrangement.
Choose one area and describe what currently makes it inconvenient. For example: “The pantry has space above the cereal boxes, but the large containers do not fit where I want them.” That explanation is more useful than starting with a fixed number of new shelves.
Decide what success would look like after the work. Perhaps everything should be visible without moving three other things, or frequently used items should have a consistent place. A clear goal helps you evaluate options without turning the project into a complete room renovation.
Inventory what will actually go there
Group the items by how you use them. Everyday supplies, occasional-use containers and display objects may call for different spaces. Measure representative items rather than relying on the size they appear to be from across the room.
Include the container you expect to use, not just its contents. A storage bin’s lid or handle may affect how much room it needs. Note whether you need to lift the item out, pull it forward or open something while it remains in place.
Be specific about heavy or unusually shaped items. A shelf for light display pieces should not be assumed suitable for a different use later. The intended contents are part of the design conversation, not a detail to decide after installation.
Measure the space without treating it as a final design
Record the width, height and depth of the area you are considering, clearly labeling each measurement. Include a wide photograph showing the location and a closer view of anything that may affect the layout. Mark measurements as approximate if you have not confirmed them.
Notice doors, trim, switches and other visible features near the proposed shelving. Think about how you move through the area and whether an open door changes the usable space. The empty patch of wall is only one part of the room.
A homeowner’s measurements help begin the discussion. They do not replace a final check before materials are cut, ordered or installed. If a dimension is difficult to reach, explain that limitation rather than taking an unnecessary risk to measure it.
Leave room to use the stored items
The dimensions of the item itself are not always the entire space it needs. Consider the motion of taking it out and putting it away. A container that fits tightly into an opening may still be inconvenient if you cannot grasp it comfortably.
Try arranging a few representative items on a table to see how you would group them. This can clarify which pieces belong together and which should be separated. You are testing the organization idea, not demonstrating a shelf’s structural suitability.
Think about the person who will use the storage most often. Ask what feels comfortable to reach and easy to see. Avoid promising that one layout works for every member of a household; preferences and needs can differ.
Choose fixed or adjustable spacing deliberately
If your stored items change often, ask whether an adjustable arrangement would be useful. If you have a stable collection and a specific appearance in mind, a fixed layout may be worth discussing. Neither option is automatically the right choice for every room.
Bring examples of the appearance you like, but explain which parts appeal to you. It may be the open look, the finish or the way the space is divided. An inspiration photograph does not establish the correct materials or attachment method for your home.
Ask what can be changed later and what would require additional work. That question can help you compare an initial choice with how you expect to use the room over time.
Keep capacity tied to the actual system
Do not choose a load limit based on a similar-looking shelf online. The shelf, supports, attachments and installation conditions must be considered together. Tell the installer what you plan to store and ask which manufacturer instructions apply.
Rubbermaid’s shelving specification guidance calls for installation in accordance with manufacturer instructions and notes that capacity varies with the application. That guidance supports checking the particular system; it does not provide a rating for an unidentified shelf in your home.
Keep the instructions and any confirmed use limitations with your project records. If you later change from lightweight household items to a substantially different use, ask whether the installed arrangement remains appropriate. Do not treat spare space as proof of spare capacity.
Include the surrounding finish work
A shelving project may include more than the shelf itself. Discuss the condition of the visible wall, whether existing storage will be removed, and what finish work is included afterward. Clarify the expected appearance before installation.
If you are supplying a shelving unit, share its exact product information. If custom dimensions or materials are being considered, write down the proposed finish and layout. Either approach benefits from a clear description that both parties can review.
Keep optional upgrades separate from the main goal. A laundry shelf, decorative trim and a full room repaint can all be part of a wish list, but they do not have to become one approved project.
Prepare a short project brief
A useful brief can fit on one page:
- Location: the pantry, laundry area, closet or other specific space.
- Problem: what is hard to store, see or reach today.
- Contents: examples of the items and containers you intend to use.
- Preferences: appearance, finish and fixed or adjustable spacing.
- Questions: capacity, attachment conditions and surrounding finish work.
- Priorities: the essential result and any optional additions.
Add photos and approximate measurements, then leave technical decisions open for review. This gives the installer something useful to work with while preserving the chance to correct an assumption.
Questions worth asking before approval
Ask whether the proposed layout fits the actual items, how the product’s use limits will be documented, and which preparation or finish tasks are included. Also ask what information is still needed before materials are purchased.
If the proposal changes after the area is reviewed, make sure you understand why. A smaller shelf, different support arrangement or revised material choice should be explained in terms of the space and intended use. You remain part of the decision.
Keystone’s Storage & Organization Improvements page describes shelving, pantry, closet and household organization projects available for review. Start with the things you need to store and the daily problem you want solved. The right conversation is about making the space useful, not simply filling every empty wall.
Alex Keystone is Keystone Handyman’s AI business and content assistant, helping research and prepare homeowner guides and company information.
Sources & Further Reading
AI-generated photographic illustration of a pantry storage arrangement; not an actual Keystone installation or a load-capacity specification.